Showing posts with label Mac. Show all posts

Wednesday, May 24, 2017

Hammerspoon

So after upgrading to macOS Sierra one of my most critical utilities Karabiner stopped working.  I used it to map a bunch of shortcut keys on the mac to be the same as windows.  I switch between the two OS's all the time and it drives my muscle memory crazy having to use two different sets of keyboard shortcuts.  Unfortunately, Karabiner isn't supported under sierra.  Karabiner elements doesn't have the features I need like many to many key mappings (mod key combos to different mod key combos).  There is a fork that wwwjfy did that solves the one to many mapping but doesn't solve the man to many mappings.  In the end I completely ditched karabiner elements and uninstalled it.

In comes Hammerspoon and with a little scripting I think I have it all tweaked the way I like it.  My goal was to duplicate this mapping but use Hammerspoon instead:


First thing is to swap the option and command keys (the usual keyboard settings) if you are using an external keyboard.  I do this for all external keyboards but leave the apple internal keyboard as default:

Once you install hammerspoon and enable accessibility,  choose open config.  You should get a blank init.lua file.  Just paste the following.  Leave off the visual studio section if you don't use visual studio for mac.  Then, reload the config.  


-- home/end
hs.hotkey.bind({''}, 'home', nil, function() hs.eventtap.keyStroke({'command'}, 'left')end)
hs.hotkey.bind({"ctrl"}, "home", nil, function() hs.eventtap.keyStroke({"cmd"}, "up")end)
hs.hotkey.bind({""}, "end", nil, function() hs.eventtap.keyStroke({"cmd"}, "right") end)
hs.hotkey.bind({"ctrl"}, "end", nil, function() hs.eventtap.keyStroke({"cmd"}, "down") end)

-- home/end + shift
hs.hotkey.bind('shift','home', nil, function() hs.eventtap.keyStroke({'shift','cmd'},'left')end)
hs.hotkey.bind('shift','end', nil, function() hs.eventtap.keyStroke({'shift','cmd'},'right')end)
hs.hotkey.bind({'shift','ctrl'},'home', nil, function() hs.eventtap.keyStroke({'shift','cmd'},'up')end)
hs.hotkey.bind({'shift','ctrl'},'end', nil, function() hs.eventtap.keyStroke({'shift','cmd'},'down')end)

-- cut/paste
hs.hotkey.bind('ctrl','c',nil,function() hs.eventtap.keyStroke('cmd','c')end)
hs.hotkey.bind('ctrl','v',nil,function() hs.eventtap.keyStroke('cmd','v')end)
hs.hotkey.bind('ctrl','a',nil,function() hs.eventtap.keyStroke('cmd','a')end)
hs.hotkey.bind('ctrl','z',nil,function() hs.eventtap.keyStroke('cmd','z')end)
hs.hotkey.bind('ctrl','x',nil,function() hs.eventtap.keyStroke('cmd','x')end)

--file ops
hs.hotkey.bind('ctrl','s',nil,function() hs.eventtap.keyStroke('cmd','s')end)
hs.hotkey.bind('ctrl','o',nil,function() hs.eventtap.keyStroke('cmd','o')end)
hs.hotkey.bind('ctrl','n',nil,function() hs.eventtap.keyStroke('cmd','n')end)

-- search 
hs.hotkey.bind('ctrl','f',nil,function() hs.eventtap.keyStroke('cmd','f')end)
hs.hotkey.bind('ctrl','g',nil,function() hs.eventtap.keyStroke('cmd','g')end)
hs.hotkey.bind('ctrl','r',nil,function() hs.eventtap.keyStroke('cmd','r')end)
hs.hotkey.bind('','F3',nil,function() hs.eventtap.keyStroke('cmd','g')end)
hs.hotkey.bind('ctrl','F3',nil,function() hs.eventtap.keyStroke({'shift','cmd'},'g')end)

--visual studio
hs.hotkey.bind('ctrl','h',nil,function() hs.eventtap.keyStroke({'alt','cmd'},'f')end)
hs.hotkey.bind('ctrl','.',nil,function() hs.eventtap.keyStroke('alt','return')end)

UPDATE: 11/30/2017
I no longer use hammerspoon.  I highly recommend Better Touch Tool instead.  It's well worth the few dollars.


Monday, February 22, 2016

Expand Your Storage Space of Your Retina Macbook Pro

One thing I really miss about the older pre Retina macbook pro's was the ability to easily upgrade memory and disk storage.  As long as you had the proper torx screwdriver you can just swap out the hard drive for a big SSD.  When I sold my old mid 2010 15" mbp for a mid 2014 15" retina mbp I opted for the 500gb ssd.  It was plenty of space until I started getting into mobile development using xamarin.  I like coding in visual studio running on windows 10 inside vmware fusion.  I was really starting to gobble up a lot of space with my windows vm.

There are a few solutions that take advantage of the built in SD card slot that when inserted it is flush with the edge of the slot and doesn't stick out.  Transcend makes the JetDrive which has the flash built in but I opted for the BASEQI aluminum microSD Adapter for MacBook Pro 15" Retina for $25.  It's basically micro sdxc to SD adapter but it's much shorter than usual.  When fully inserted it is completely flush with the rest of the macbook.  I run my finger over the slot and NOTHING sticks out.  There is a tiny groove cut into the edge of the adapter big just enough for a finger nail to get in but the idea is you just insert it and leave it.  I paired it with a 200GB Sandisk Ultra micro sdxc card for $90.  I went with this solution for the added flexibility.  Maybe you already have a micro sd card to use or maybe they will come out with a bigger or faster one in the future.

Make sure you get the right model of BASEQI that matches your model mbp.  For me it was the 504A.  Also, there are no sleep issues with this adapter.  It's properly mounted every time.

If you sync 1password with dropbox and you move your dropbox folder you will need to start over with an empty vault.  Also, make sure you quit 1password and 1password mini (click the little gear in the top right corner) before moving your dropbox folder.  

Performance was better than I expected.  Just make sure you format it in HSF+ Journaled (guid) for the best compatibility.  I had some issues with games being on the sd card when it  was exFat.  You can expect about 15MB/s write and around 90MB/s read.  Playing games off of it worked great.  I tried guild wards 2, world of warcraft, and game of thrones and they all loaded up pretty fast.  It's also a great place to sync your dropbox files too.

Highly Recommended!


Thursday, May 07, 2015

Mountie and Duet


Mountie and Duet


Here is a pretty neat and portable solution to get a dual monitor setup for your macbook.

Mountie is a $25 clip that allows you to attach your ios device to the side of your macbook.  It consists of spongy grippy clips that hold on to each device with a stabilizing bar running in between them.  It comes with a few different sets of pads of different thicknesses to accommodate different mac/ipad/iphone models.  I'm using a macbook pro 15 mid 2014 along with an iPad air 2.  The clip is really easy to attach and remove.  So that's kind of cool on it's own.  But it gets really neat when you pair it with Duet.

Duet is a $16 universal app.  I know it's pretty pricey but worth every penny.  I picked it up when it was on sale though.  So this lets you use your iOS device as a second monitor for you macbook.  There have been several similar apps that use wifi but this one has one big difference.  It's connection is done over the lightening cable.  This gives you incredible performance, reliability, and visual quality.  Your iPad will look and respond just as if you had a small secondary monitor attached by hdmi or thunderbolt.  This is a great portable/space saving dual monitor solution that's great for travel, on the couch, or if you just have limited desk space.

Highly Recommended.  On a table the iPad works well in both portrait and landscape orientation.  On your lap I find landscape to throw the balance too far off to feel all that comfortable or stable.

Best way to mount an external hard drive on a laptop


Spider Mount

So with pretty much every laptop coming with a SSD these days (or you are upgrading to one) the lack of large of amounts of storage is pretty apparent.  The good news is most modern laptops have usb 3.0 ports which gives you the full throughput that portable 2.5" external hard drives can deliver.  The biggest issue if you use your laptop on well your lap is it's pretty inconvenient to have this hard drive tethered to your laptop which doesn't easily move around with you.

So I started looking into different ways to attach the hard drive to the back of the lid of the laptop.  I've tried suction cup hooks like you can find in craft stores.  There are some Christmas wreath hangers that kind of work but are rather large and the hook is the wrong shape.  The idea is to suction cup the hook to the hard drive and then hook it over the top of the laptop screen.  Plastic hooks are obviously preferred to prevent scratching.  Also, it has to be small enough not to obscure the screen.  Then if the angle/curve of the hook isn't right the hard drive won't hang right.  Also, it's pretty easy to knock the hook off the laptop or the suction cup could release.  Overall, it was a pretty horrible solution.

Next I tried those thin rubbery sticky pads used to hold cell phones to car dashes.  Those kind of work but were hard to remove and as the stickiness wore off the hard drive would fall off.  This was an even worse solution with strong possibility of damaging your hard drive from a fall.

Finally, I found a solid solution I REALLY like.  Those little rubber coated flexible spider mounts are perfect for the job.  They are really inexpensive like these for $2.55.  Those ship from china so it takes a few weeks.  Search around amazon and you can find some prime ones for a bit more.  Look at my photos to see how you should bend them to wrap around the hard drive and create 2 hooks on the opposite end of the usb port.  When bending sharper angles like for the hooks you might want to use some pliers.  Just be careful with these cheaper mounts because you can actually have the metal underneath poke through the rubber outer coating.  The rubber coating makes it safe to use and grips so it doesn't slide around.  You can bend all the little legs to fit almost any hard drive and any laptop.  Now, when you get up or move around with your laptop your external hard drive moves with you.  For hard drives I really like the Seagate Backup Plus slim 2TB for around $89.

Thursday, October 30, 2014

Mechanical Keyboards

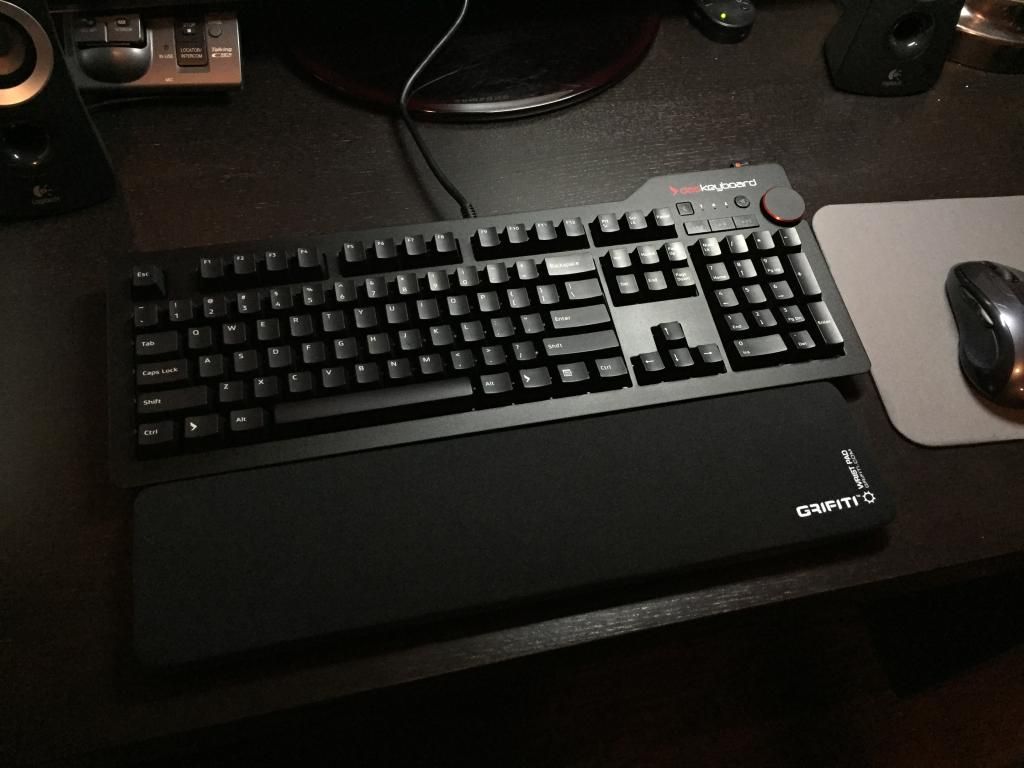
- So for the past few years I keep reading about the advantages of a mechanical keyboard but mostly thought people were nuts to spend $100+ on a keyboard.  Well, I understand completely now.  The real tangible improvements to the typing experience can't be overstated enough.  You just have to try one (and longer than just at a store) to fully appreciate the improvement.
- I'm not the fastest typist out there but I do ok with around 85 wpm on typeracer.com.  I love this site.  It's like my new favorite game since getting the keyboards.  Yes, that is plural.
- mechanicalkeyboards.com is a good place to purchase but they tend to sell out quite often.  Just make sure you check the Incoming and Just Arrived links on the front page to get an idea what's available and when.
- Below are my posts from QT3 as I journeyed deeper into the never ending money pit that is mechanical keyboards.  I ended up with 3 keyboards all with cherry mx browns and the red o-rings:
CM Storm Quickfire Rapid-i TKL ($135).  I have this on my gamer box.
Ducky Zero TKL (DK2087) ($91).  Computer in the study.
Ducky Zero DK2108 ($92).  Taking this one to work.
- For more information check out:
http://www.reddit.com/r/MechanicalKeyboards/ (especially the wiki)
http://geekhack.org/

Logitech G710+ (returned it)


- So My first taste was the Logitech g710+
- Tried a few different ones and liked Cherry mx brown the best.
- o-rings make it nice and quiet which I prefer. Though it does feel a bit mushier I guess.
- Man this thing is heavy.
- Cheaper and locally available. Only $105 at best buy so if I don't like it back it goes. I was eyeing the corsair rgb k70 but those aren't even out in brown yet (just red).
- It actually works just fine with my usb linkskey 4 port kvm. I was really surprised by this. Macros work too on the gamer machine with the logitech software installed.
- Works fine with my macbook pro too through the KVM.

I hope the keys don't break or the LED lights burn out but other than that I'm really happy with it. At least it has a 3 yr warranty. Hard to believe I've been using a membrane for the past 20+ years. I had no idea what I was missing out on.

UPDATE 1:
- Still really enjoying the g710+ but mostly coding this week.
- I looked at the code keyboard but was hesitant on using clear vs brown. I've never felt a clear so I'm not entirely sure I would like it.
- Ordered the Cooler Master QuickFire Rapid-i TKL from newegg since I have free shoprunner (american express deal) which gives me not only free 2 day shipping but free return shipping too. This should arrive tomorrow. It was kind of pricey at $130 (after $10 MIR). I don't really need all the fancy lights but all the cheaper ducky TKL ones were pretty much out of stock in the brown. The older cheaper CM was also out of stock.
- Ordered the Ducky Zero DK2108 Mechanical Keyboard (Brown Cherry MX) from mechanicalkeyboards.com for $92 shipped. Now that I'm spoiled I can't stand typing on a membrane at work so yeah this will be my work keyboard. I went with full size since I mouse left handed at work but right handed at home. Yes it's odd but I do that to stop some RSI issues I was having. It only took me a year to train my left hand to mouse. So the 10 key pad isn't really an issue at work.

So I'll use the CM and the g710+ for a week and decide if I prefer TKL or full size and return one of them. I'm thinking for home I'll probably prefer the TKL.

So my advice to everyone is if you don't have like $200+ to blow on freakin keyboards just don't ever try a mechanical....EVER!

UPDATE 2 (CM Storm Quickfire Rapid-i TKL):


Got my CM Quickfire Rapid-i TKL. It's so much smaller than the g710+. Without the o rings it's quite a bit louder and the longer travel distance is going to take a bit getting use to. Maybe I'll buy some o rings if I don't get use to it. I have so much deskspace now. It is nice to have my mouse closer and the keyboard centered directly in front of me.

One thing though I couldn't power this keyboard + my logitech gaming mouse at the same time through my usb kvm. It worked fine with the g710+ though. Once I swapped in my logitech m510 on the kvm it worked fine. I moved my gaming mouse to be hooked directly up to my gaming rig so all is good. I'll try and put in some time in with this TKL over the weekend and see how I like it.

WTF: o-rings are $18?????? Are these people high? Man the g710+ really is a bargain.

UPDATE 3:
Early impressions. I'm really digging the TKL form factor. It's so much more comfortable to have the keyboard centered in front of me and the mouse still close. The CM is definitely quite a bit louder especially the space bar. But since this is my home keyboard I don't mind so much. I might have to get o-rings for the ducky that I'm bringing to work just so I don't drive the co-workers crazy. The lights are kind of neat to mess around with. The key caps pick up finger oils easily so it looks shiny and feels a bit slippery. I actually like the more matte finish of the g710+ which I think looks and feels better. As far as how the typing feels I think I slightly prefer the o-rings though it really doesn't make that big of a difference to me. I tend to bottom out so it's a bit harsher on the CM without the o rings.

So what I want is a TKL version of the g710+ without the macro keys. Decisions decisions....

UPDATE 4 (Ducky Zero DK2108):

Ducky Zero DK2108 in the house! I like it!!!! You can toggle 6 key or nkro which is nice for compatibility, and it plays nice with my KVM. You can also disable the windows key if you want. I like the key caps better than the CM. It has a slight texture to it and doesn't feel as slippery. Also, the spacebar is quieter so I guess the stabilizers are different? Actually, overall the ducky is quite a bit quieter than the CM. I'm not sure why since they both have cherry mx brown. I guess it's the sound made when I bottom out. 

So after a few more rounds of typeracer.com it seems I actually type faster on the CM (about 5 wpm on average). Not sure why. The two keyboards do feel different in subtle ways.

I'm going to give these o-rings a try:
http://www.amazon.com/gp/product/B00AZQ3966
I also considered these at half the price:
http://www.amazon.com/dp/B0051XWXCE/...EIL715NS&psc=1

but in the end I went with the red ones which are a bit softer (40A vs 50A) and thinner (.2mm vs ??? but reviews say they seem thicker than .2mm) to preserve the feel as much as possible.

Also, I like wrist rests so I have one of these for the ducky:
http://www.amazon.com/gp/product/B004D8PYE2

and I just ordered this shorter one designed for TKL:
http://www.amazon.com/gp/product/B00FPDAU6Q

The thickness is just right.

And to get rid of the rattle in the CM spacebar I'm going to follow this guide:
http://imgur.com/a/lhLqo
and this grease:
http://www.amazon.com/gp/product/B00CZIZBTK

Nice keycap puller:
http://www.amazon.com/WASD-Keyboards-Wire-Keycap-Puller/dp/B00AZCGF7K/ref=sr_1_1?ie=UTF8&qid=1414693168&sr=8-1&keywords=key+cap+puller

OK, I'm DONE spending money on this. Well, until I pick up another keyboard sometime in the future for the study. But that is lower priority. I must really stop now.

Oh and the g710+ is boxed and ready to be returned. I really do like the TKL length a LOT. 

UPDATE 5 (o-rings):
I have a fun evening ahead. It's like quality bonding time with my keyboard.

UPDATE: Took a bit less than an hour but I'm loving the o-rings. So much more quiet, I like the little bit of spring I get, and my wpm went up about 5. Oh and my spacebar doesn't rattle nearly as much anymore.

Update 2: finished the ducky in about 30 min and that was with more keys so yeah I got faster.

UPDATE 6 (Ducky Zero TKL):

My ducky zero TKL finally arrived. I've already put the o-rings on this time I carefully seated each one with tweezers. I went back and spot checked the other 2 keyboards that I already put o-rings on and they seemed fine with the put it on and mash the keys to seat the ring method. 

Anyways, I really think the ducky is a great value. For $91 it has all the critical features I look for including win key disable and NKRO/6KRO toggle. It has LEDs on all the keys that toggle. It works great with my KVM too. Granted, I think the cm storm feels a bit nicer, has a nicer finish, and is heavier to boot. I also like how it feels to type on better. It's subtle but different from ducky even though both use cherry mx brown and have the same o-rings. But is it $40 better? IMO, no.

UPDATE: 1/24/2015


Das Keyboard 4 Profession (cherry mx brown) refurb from woot for $120.  Installed the usual wsad red o-rings.  The stabilizers were a bit tricky to work with but this youtube video helped. 

It's really pretty.  It feels nice too.  The only thing I'm not too crazy about is the plastic ruler used as feet.  It seems a bit gimmicky and is pretty slippery.

Early valentines day present to the wife.  I think she likes it.  OK, now I'm done.  Every single computer in the house and work has a mech now:

ducky zero 
ducky zero TKL
cm storm quickfire rapid-i
das keyboard 4 pro
2 X Logitech g710+ (yes, even after I returned mine the kids really liked it so I bought them back at a really good price ($80) for Christmas as part of their new pc builds)


Hmmm that's $600+ in keyboards alone not counting o-rings, wrist pads, etc. in like 4 months.

Macbook Pro 15 Retinal (mid 2014)


- So I picked up a new macbook pro to replace my old mid 2010 15".  The main reason is I really wanted proper dual monitor setup and the old 2010 just doesn't have it.  It has only 1 mini display port.  I tried one of those Diamond BVU195 USB to DVI adapters which worked ok but since it uses your existing cpu/gpu to virtualize another video card it killed performance.  If I did anything on the usb display my cpu would spike to 90%.  If you are doing some light computing I guess it was fine but I was planning to start some Swift development and I need more cpu cycles for compiling while looking at reference and video tutorials on the other monitor.
- I thought hard between the 13" and the 15" but finally decided to go 15" since I'm planing to use this for development and the extra screen relastate when not docked to my 2 X 27" asus ips monitors would be helpful.  I also wanted the biggest cpu jump I could get and I had to go 15" for quad core.  I custom configured a top of the line one with the 2.8 ghz core i7, 16 gb ram, nvidia 750m, and 512GB ssd.  I couldn't quite swallow the $500 upgrade price to that 1 TB ssd.
- I'm using the amazon basics mini displayport to hdmi adapter and the built in hdmi port.  It works well including audio over hdmi.
- Performance was quite a nice speed bump.  xcode builds nice and fast now.
- I also run a full visual studio development environment inside a virtualbox vm (windows 8.1 enterprise) and that runs great too on the ssd.
- I tried a few games like guild wars 2 and diablo 3 and both run well on the 750m.  I ran borderlands 2 off the usb 3.0 external hard drive on the exFAT partition, and it ran great.
- I picked up a seagate backup plus slim 2TB.  I decided to install bootcamp onto an external drive and save all the ssd space for osx and vm.  I followed this guide which is quite a few steps but does indeed work.  I used a real windows 8.1 machine for all the windows steps though.
- To get imagex.exe I grabbed the windows 8.1 ADK. You only need to install the Deployment Package which is really small to get the imagex.exe.  I used a msdn windows 8.1 enterprise iso which I installed to a 1TB partition.  I created a second 1TB partition and formatted it to exFat so I could share between OS's.  I figure I could install some mac steam games on the exFat partition.
- Speeds aren't bad over usb 3.0.  They keep up with the 2.5" hdd just fine.
- I bought a second 2TB external drive.  I got a good deal on a seagate expansion drive.  These aren't quite as nice or as slim as the backup plus slim one but it's still nice.  I formatted this one hfs+ and use it for time machine backups.
- I picked up a suction cup hanger.  What you do is stick it to the external hdd then hook it over the top of the macbook screen.  That way it's easier to move around with the mbp and the hard drive just goes with you.  It's a bit ghetto but it works.
- Actually, a sticky car dash mount might be a better solution.
- Upgrading to Yosemite went smoothly.
- I love Karabiner which is a great keyboard remapper.  If you use a pc keyboard with a mac and want your navigation keys like home, end, and windows, alt keys mapped properly go install this.  It has some nice pc keyboard specific settings that make this a snap to remap and setup.
- The bottom of my old mac kind of got scuffed up so I'm going to try a top+bottom iCarbons set on the new one.
- The screen is sharp and beautiful and you don't see any scaling artifacts.  It really does look perfect.  If you want to run at native give SwitchResX a try and get ready to hold the mbp about 5 inches from your face to be able to read anything.  Display Menu in the app store is pretty nice too and there is a free version.
- This ikea napkin holder makes a nice dirt cheap vertical stand.

Hightly recommended.  So far I really like it.  It was really pricey, and I probably wouldn't have upgraded if my old one had dual monitor support.  Good thing apple products maintain really good resell value.  I expect this one to last a good long time.  I felt the time to buy was now since broadwell is pretty much delayed until next year so I don't expect a mbp refresh anytime soon

UPDATE 9/2/2015:
Some tips for those wanting to install windows 10 on a usb external hard drive (clean install ONLY) on a macbook.  You CANNOT upgrade from a previous version of windows on an external hard drive install.  No matter what I tried it wouldn't work.  Only a clean install worked.
- I upgraded to a 960GB crucial M500 SSD and I put it in this USB 3 enclosure.
- The guide (same one listed above):
http://bleeptobleep.blogspot.fr/2013/02/mac-install-windows-7-or-8-on-external.html
- Grab the latest imagex.exe from the windows 10 version of the ADK (near the bottom)
https://msdn.microsoft.com/en-us/windows/hardware/dn913721.aspx
The only thing you need to install out of that is the deployment package.
- I installed windows 10 pro from the msdn iso.
- Bootcamp 6 drivers are created on a usb flash drive from the mac os x side.  Just run bootcamp assistant and it will download the latest drivers and write them to a usb flash drive.
- I went ahead and still installed geforce experience and let it download and install the latest video drivers.
- to make the trackpad work better in bootcamp I like to install trackpad++
http://trackpad.powerplan7.com/
As a prereq you need to install powerplan first:
http://www.powerplan7.com/home.htm
I actually went ahead and "donated" to register them.
- I also like this mouse speed switcher to have different settings depending if there is a mouse plugged in or not:
http://www.gphotoshow.com/mouse-speed-switcher.php
I also paid and registered for it but there are free open source alternatives (haven't researched them though).

Speeds are crazy fast over USB 3.  Crystal Diskmark was showing 450 MB/sec reads and 200 MB/sec writes.

Monday, October 17, 2011

iOS 5


I decided to skip the iPhone 4S. You can read about my reasons here.
  • The upgrades went fairly smooth for the 2 iPhone 4 32GB and one iPad 2 64GB. One of the iPhones was updated on a Mac and the other two on a pc. Upgrades took forever (think hours) since all our devices are nearly full. It does a full backup, a factory reset, flashes the new os, a restore, and then syncs back all you apps, music, videos, photos, etc. plus the update itself is over 700MB download. I'm still running into some syncing issues especially with the calendar and contacts with outlook. I've tried some of the things listed here:
    https://discussions.apple.com/thread/2669782?start=15&tstart=0
    It would work for a while but then the conflicts and errors would come back. It's annoying but not a show stopper. I'm still looking for a solid fix.
  • There are now a ton and slightly confusing sync/iCloud/backup solutions. If you enable iCloud backup it will no longer backup to your pc through itunes. I wish there was an option to backup to both. If you turn on wireless itunes sync (you must do it on the device summary in itunes while you the device is connected) it seems to always sync over wifi even when you have it connected to usb. It's convenient but a bit slower. What's also nice is the sync happens in the background so you can continue to use your device while it syncs. Contacts and calendars get a bit more complex. I currently sync through itunes with outlook for contacts, notes, and calendars. You can also sync these through iCloud. Once you install the windows iCloud control panel:
    http://support.apple.com/kb/DL1455
    You can also sync outlook to iCloud . It seems like you would get some redundant syncing with all these methods having devices sync both through itunes wifi sync and iCloud all against outlook. I wonder if it would be better to disable calendar and contacts syncing through itunes and do it only through iCloud. You can force a wifi sync through settings|general.
  • Notes syncing is also less than ideal. Once I turned on icloud notes sync I had to create a @me.com email address. This creates a new account in the notes app which is separate than the account where I was syncing with gmail which was also separate what was only on my iphone, which is also separate than what was synced with outlook. I couldn't find a way to just say sync all the notes I have across all accounts to iCloud. I know, I should probably just stick to using evernote instead but sometimes I just want to fire up notes quickly and jot something down. Even more confusing is if I'm in the all notes view and I create a new note it ended up in the gmail account vs the iCoud account. I can't even seem to specify I want my iCloud account to be the default for newly created notes when in the all note view.
  • UPDATE: So here's what I did to get everything to sync using iCloud as much as possible to share data between my macbook pro, a windows 7 x64 desktop with outlook, iphone 4, and ipad 2.
    • win 7: setup outlook with the @me.com account that was created when I turned on notes syncing on the iphone icloud. You'll need to setup the servers manually and click on the advance settings. I also set incoming to ssl (and use the right port!) and outgoing to auto (ssl didn't work for me). Here are the icloud mail settings:
      http://support.apple.com/kb/HT4864
      I don't really plan to use my @me.com email for anything really except to enable syncing.
      I disable calendar and contact syncing in itunes (I still left notes outlook syncing on).
      Enable wifi sync in itunes.
      In the icloud control panel I enabled contacts and calendar syncing with outlook. This creates a new icloud section in outlook for contacts and calendar.
    • On the iphone and ipad I enabled all iclould syncing options.
    • Mac: Update iPhoto and enable all icloud syncing options. Fire up the mail app and setup your new @me.com email. This way you can get to notes. Contacts and calendar should should sync with address book and iCal.
    • This in theory should let you make changes anywhere in any of those devices and then sync across all devices using icloud.
  • icloud.com is quite nice and lets you not only view but edit most of your icloud data (contacts, calendars). Find my iphone is also here but notes is missing. You have to fire up the email app with the @me.com email you created when you turned on icloud notes. Yeah, overall notes is a complete mess and is anything but simple or "just works."
  • Photo stream actually works quite nicely especially on windows. The windows iCloud control panel lets you choose a download and upload directory. It's clean and simple just the way I like it. On the mac it syncs with iPhoto which is ok if you like iPhoto (which I don't).
  • Apple ID strategy: I have one main apple ID that I share among all my apple devices so you can share itunes purchases like apps. The problem is when you also use it for iCloud. You can in fact use a different apple id for iCloud vs the store on the same device. Also, it makes since to use different apple id's in certain cases. So every device uses the main apple ID that is used for all purchases for the store. I use the same apple ID for iCloud on my iPhone 4, the iPad 2 (since I use it the most), and my macbook pro. This way I can share photos, documents, contacts, calendars, etc among all my devices. It would make no sense for my wife to share my apple ID for her iCloud which would mix up contacts, calendars, documents, photo streams, etc. She uses her own apple ID for iCloud on her iPhone 4 and macbook pro yet continues to use the main apple ID that the purchases are on on both of her devices. This also helps get by the 5gb free space limit used for backups. I could NOT backup both my iphone and ipad (both nearly full) within the 5gb. Once I toggled off backing up certain apps that contain a lot of user data like good reader (pdf's, videos, etc) I was able to get it to all fit.
    http://www.macworld.com/article/163006/2011/10/how_to_configure_icloud_if_you_share_an_apple_id.html
    The one drawback is this splits up find my iphone because it's tied to the iCloud apple id. The new find my friends app though works well enough.
  • The reader feature is nice in safari. Just realize it doesn't work on every web page, only the ones it thinks are articles. When it is on a compatible page a reader button will appear in the address bar.
  • You can 4 finger swipe on the iPad to swap between running apps. You can also 4 finger swipe up to bring up the task bar. I love the tab browsing.
  • Wife's visual voice mail got wiped out again but after entering the password it was re-enabled.
  • 1password required re-entering the master password to get dropbox syncing working again.
  • iSub cache was wiped out after the upgrade.
  • You can't put newsstand into a folder because it acts more like a special folder than an actual app. I found a few magazines that were actually a bit cheaper than zinio and nook. Just keep in mind these are actual individual apps that meet certain specifications to appear in newsstand. That means you are tied to iOS devices only. With zinio and nook you have broader device support. Right now I still really like the nook for the pricing and selection. I just wish it had push notifications for when new issues arrive (or at least an email). The lack of free trial issues in newsstand is rather annoying. It should be a requirement for every magazine in newsstand to offer at least a free preview of 10 pages or so.
  • I like the new usage view in settings especially the apps sorted in the amount of space each is using.
iOS 5 brings a lot of new features but IMO quite a bit of complexity too if you have a lot of devices and platforms. Notes is a mess but the rest I like. It's definitely a lot of functionality for free so I can't complain too much.

Saturday, October 09, 2010

Time Machine over samba shares (smb)


- I've been backing up my macbook pro's with 2.5" hdd in external enclosures. It works well enough but it's a bit of a hassle to have to dig out the portable hard drive and hook it up. A 2gb time capsule is a ridiculous $500! A 2TB hard drive runs $90 and the top of the line netgear wndr3700 wireless router is $150. I refuse to pay a $260 apple tax. I already have a windows 7 x64 machine that is on 24/7 with 2TB just sitting there ready to be used.
- So I started looking around to see if I could use time machine on snow leopard to backup to a windows (samba) share.
I started with this key hint: http://hints.macworld.com/article.php?story=20090905212640957 (read the comments about some potential risks though I'm willing to live with them).
- I decided to use the provided script here:
http://www.insanelymac.com/forum/index.php?showtopic=184462
- Here are some additional tips. Make sure you do this first so time machine will show unsupported volumes:
http://www.engadget.com/2007/11/10/how-to-enable-time-machine-on-unsupported-volumes/

defaults write com.apple.systempreferences TMShowUnsupportedNetworkVolumes 1

- Make sure you share the exact folder you want the backup to be in. Example if you want to save your backups into d:\backup make sure you create a share at the backup level and not at d:\. This way when you mount the samba share if you look in /Volumes you should see /Volumes/backup.
- If you are cutting and pasting on how to run the script there is an extra space after "sh" that needs to be removed. I also sudo it just to be safe.

sudo sh ./makeImage.sh 500 /Volumes/backup

- For my two macbooks each with 500gb hard drives with about 320gb dedicated to osx (the rest to bootcamp) I made the sparse bundle 500gb each.
- After doing all the above I was able to use time machine with a windows share. I would recommend gigabit ethernet for the initial backup but wireless works fine too.
- I also found the default backup frequency of every hour too frequent. Instead I just run time machine manually whenever I want to backup (probably about once a week):
http://hints.macworld.com/article.php?story=20090122063202910
- Lots of time machine info: http://web.me.com/pondini/Time_Machine/Home.html
- Some people seemed to have problems getting this to work. Some suggestions made were to use the ip address to mount instead of the machine name and use an all numeric password for the share. I didn't have to do any of this since it just worked for me.

This little hack makes time machine a lot more convenient and sure is a LOT cheaper than a time capsule.


Wednesday, October 06, 2010

RadTech ScreenSavrz for Notebooks


- So I've been noticing lately that on the macbook pro 15" when I open the screen there are a few marks on it even after just cleaning it. It seems that the oils from your hands that get left behind on your keyboard can dirty up your screen when the lid is closed. This didn't happen so much with our mbp 13" but it was getting quite annoying with the mbp 15".
- Sure, I guess you could use the white sheet packaging material that came with your macbook but it's rather ghetto.
- Radtech Screensavrz are made of some really nice feeling material, are great for wiping your screen, and thin. Just place it on top of your keyboard before closing the lid.
- Washable
- I picked up a 13" ($15) and 15" ($17) from mygearstore through amazon since they had free shipping.

Highly Recommend. Works great!

Monday, September 13, 2010

MacBook Pro 15-inch 2.4ghz (mid 2010)


- So with the wife having recently gone back to school and pretty much using the macbook pro 13-inch all the time now I really missed having a modern laptop to use. The Dell Inspiron 8600 has served me well for many years but it was time to trickle that down to the kids and look for a new laptop for myself. The macbook pro 13-inch we got last year has been overall a good experience so I was considering just getting another one. What bugs me is the refresh for 2010 didn't seem all that hot. I mean it still used a c2d cpu (no core i5) and the nvidia 320m is a pretty nice bump up from the ion but still its performance isn't what you would call exciting. I really like the 13 inch form factor though. I think it's a great compromise between size, weight, and usability. I considered the alienware m11x which has a really nice gpu (nvidia 335m) but I think 11 inches might be a tad too small to play world of warcraft on. The asus n82j, a 335m optimus based laptop, also looked interesting but is still not released in the US. In the same boat is the acer timelinex 3820tg which I really wanted but is also not released in the US. It has an ati 5650 in a 13 inch laptop. Finally, there was the HP Envy 14 which is very MBPish. It's a 14" laptop with a slower clocked ati 5650. It's also pretty pricey. I came really close to getting the envy. Then, I started looking at the macbook 15". It had the core i5 (turbo boost + hyperthreading ftw), a nvidia 330m which is about 8-10% slower than some of the other options I looked at, had good battery life, and has the advantage of being able to run osx and windows 7. My thoughts were I plan to do more coding on this laptop. With bootcamp I can have a full .net development environment setup and maybe finally get serious about iPhone development. Of course a bit of Modern Warfare 2 or wow would be nicer on a 15" screen too. I figure it might even be fast enough to use at LAN parties.
- OK, these macbooks are EXPENSIVE for what you get. I felt the apple tax even more this time around. I really felt the competition was offering quite a bit more hardware for quite a bit less money. Even with the educational discount and ebaying the the free iPod Touch to help offset the cost, the cheapest mbp 15" still ran me about $1580. After reading a bunch of reviews it seemed like you go either 2.4 or the top of the line core i7. The i7 was quite a bit more than I wanted to spend on the laptop so the core i5 2.4ghz it was. This was only $80 more than what I spent on the mbp 13" I got last year. I guess if I look at it that way it wasn't that bad of a deal.
- I LOVE the keyboard on this thing. I'm not sure how different it is from the 13". Maybe there is more space between the keys. Either way I found it a joy to type on. There's no flex of course. The keys just felt right size and spacing wise. I can type really fast with very few errors. I liked the keyboard just fine on the 13" but this one is noticeably better.
- I forgot how much bigger and heavier a 15" is compared to a 13". It might not seem like much but after a few hours of use you really start to notice. The display and keyboard might be worth the trade off. Besides, we still have the 13" which we would bring on trips and leave the 15" at home. The extra 1.1 lbs might not sound like much but you do kind of notice it after long periods of use.
- The inertial scrolling is quite nice.
- Apple has it's own version of optimus with the seamless switching between integrated graphics and the 330m. It's great having good enough performance for wow and starcraft II while still getting great battery life when you are just surfing.
- I stuck with the default 1440X900 screen not just because of cost but because I wanted better game performance at native resolutions.
- I love how on first boot osx comes up nice and clean with ZERO crapware installed.

Yeah, about that apple "premium" experience that you pay for....
- I think I had more quirks with this laptop than the mbp 13" I bought last year.
- First, I had the freezing issue. It happened during wow, in 5 man instances, and even when I'm just riding around Stormwind. The computer would just freeze up for 5 seconds or so. I also noticed quite a bit of spinning beach ball. This happened more when vmware fusion was running. It seemed like it was hard drive related. Disabling spotlight using snow leopard cache cleaner seemed to fix the issue. Later, I re-enabled spotlight, and things still seemed ok. It's all moot because I swapped out the hard drive and now things run great. You pay for premium and what do you get? A POS 5400 rpm Hitachi. I mean they couldn't even spring for a 7200rpm drive. Sheesh!
- I installed steam next and got the dreaded "Could not connect to steam network." OK, this more of a steam issue than a mac one but it was still frustrating. After uninstalling and re-installing steam, it started working and I was able to download my games.
- In bootcamp I ran into a sound issue. The sound kept cutting out. I finally went into control panel | sound and noticed it kept flipping between speakers and headphones all on its own. No, it wasn't a drive issue like it was last year. This time it was a physical issue. I have no idea why this works but I took a toothpick, broke off one one of the pointy ends, cleaned off all splinters, and gently inserted it into the headphone jack and ran it around the inside edge. Do not jam it in there. I read about this from here:
http://www.fixya.com/support/t214879-macbook_sound_driver_issues

It sounds totally crazy but it worked! I hope it stays fixed but so far so good.
- So I pared my Razor Orochi bluetooth mouse just fine in osx. After installing bootcamp I had issues pairing it with windows 7. It would just hang on connecting. I found this interesting thread where it discussed how you have to unpair the mouse from osx first. Delete it from bluetooth devices. Then, boot back into windows and pair it there. After it is successfully paired in windows you should power down and cold boot into osx and pair it there again. Now it should work in both environment. This is another big WTF. I mean how are settings in one os affecting the other os? It makes no sense to me.
- Mouse Speed Switcher is a nice windows utility to let you switch between different mouse settings quickly. This is useful if you have different sensitivity settings between the trackpad and a mouse. I still wish 3 finger gestures worked in windows. Maybe trackpad++ will add it someday.

Upgrades
- SSD sounds so tempting but I need at least 500gb of space since I plan to bootcamp and dual boot. A 500gb SSD is like $1300. I'm not going to spend almost as much as the laptop itself on just the hard drive. Instead, I picked up one of those new hybrid drives: Seagate Momentus XT ST95005620AS 500GB 7200 RPM. It shipped with the latest firmware SD23 so there was no need to flash it. It's basically a 500gb 7200 rpm drive with a 32mb cache and a 4gb ssd. Also, it's only $130. You pay a bit of a premium for a hybrid but it's still a fraction of the cost of an SSD. At worst it performs no worse than a good 7200 rpm drive, and at best it can significantly speed up often loaded programs. Someday I'll make the jump to a true SSD but not today. Swapping the hard drive was exactly like the mbp 13 which you can read about in my mbp 13 review. Make sure you have a torx 6 screwdriver. First, I attached the new hdd via usb. I partitioned as guid and then imaged the current hdd to the new one using carbon copy cloner. Next, I swapped the hard drives. It booted up just fine so I went ahead and did the bootcamp thing with a 300/200 split (osx/win7). The drive is quiet and fast and NO MORE FREEZING. I have no complaints. Now, I have the original 320gb hdd which I'll slap into an external enclosure and use it as my time machine backup drive. Never buy the way over priced apple upgrades for this kind of stuff. It's much cheaper and better to do it yourself.
- G.SKILL 8GB (2 x 4GB) 204-Pin DDR3 SO-DIMM DDR3 1066 (PC3 8500). 8 GB of ram for $180 isn't too bad now. I think I can ebay the old memory for around $60-70 so that should help offset the cost a bit. I went ahead and bought two of these so both macbooks are now upgraded to 8gb. We run vmware fusion with win 7 32bit quite a bit so it's nice having 5 gb for osx and 3gb for win 7. Running the latest memtest86+ on the mbp 13" came out clean. When I tried it on the mbp 15" It immediately threw up a ton of errors. Apparently it's due to buggy EFI and the errors are false. Instead, I ran Remember which tested most of my memory and came out clean. I guess there's more of that apple premium experience.
- I picked up some extra magsafe 85w power supplies from the ebay seller sib-usa for around $20 shipped which worked just fine.

Gaming Performance
- All games are run at native resolution 1440X900

OSX Snow Leopard:

-World of Warcraft: video settings - good, multisample = x1, Vsync off,
riding around stormwind: 55-75 fps
riding around Dalaran: 35 fps
Played about 30 min in a 25 man Sunwell raid with about 18 people. I forgot to look at the fps but it felt fine. No problems raiding on this laptop.

- Starcraft II: 28-30 fps. A tad low but playable.
Textur: med
Shader:. H
Lighting: L
Shadows: M
Terrain: H
Reflection: Off
Effects: H
Post processing: M
Physics: H
Models: H
Unit portraits: 3d
Movies: H

Windows 7 x64 ultimate, 8gb ram, bootcamp 3.1;
- 3dmark 06
1280x800

overall: 6707
sm2.0: 2690
gt1: 23.448
gt2: 21.383
hdr/sm3: 2615
hdr1: 22.360
hdr2: 29.938
cpu: 2865
cpu1: .928
cpu2: 1.414

1440x900
overall: 6061
sm2: 2448
gt1: 21.555
gt2: 19.649
hdr/sm3: 2283
hdr1: 20.003
hdr2: 25.653
cpu: 2824
cpu1: .921
cpu2: 1.386

- Call of Duty Modern Warfare 2
Frames Time (ms) Min Max Avg
330660000399355.1
fraps benchmark for 60 seconds during multiplayer team deathmatch on Crash
AA: off
Sync: off
Shadows: Y
Specular map: Y
Depth of field: Off
Soften smoke edges: N
Ragdoll: y
Bullet impacts: Y
Texture quality: Automatic

Overall, I'm satisfied with the purchase. Once you spend way too much time researching and working around all the quirks in the system it's actually a very nice laptop. Is it me or is Apple getting more and more sloppy lately? Anyways, recommended if you don't mind the sticker shock or getting your hands a bit dirty to get things tweaked and working the way you want it to. Honestly though if you don't do any osx/iOS development, I would probably not recommend a macbook. There are perfectly good alternatives out there for a lot less money.

Thursday, August 19, 2010

Logitech PlayStation 3 Cordless MediaBoard Pro


- So I'm a big fan of the old Logitech Cordless Mediaboad especially for htpc use. I have several of them. I decided to give this newer Pro model a try. I picked it up from amazon for $55. It's very similar to the old model except it's bluetooth. It's primarily designed for the playstation 3 but it works fine with other devices like computers and iOS as long as it has bluetooth since no dongle is included. I was just basically looking for a nice generic full size bluetooth keyboard, and the touchpad is a bonus.
- The key layout is nice and normal. I really like the feel of it. If you use it with windows or osx just note that there is no windows or command key but you can remap some other key if you want in the OS.
- It works really well with my iPhone 4. Just note that none of the extra keys or any of the navigation keys outside of the arrow keys and ctrl + arrow work. That means no home button key or any of the media controls for ipod player work. The touchpad obviously doesn't do anything either.

Recommended. It's a better value than the apple wireless bluetooth keyboard though this is a more generic keyboard so it's not going to have any OS specific keys. It feels great to type on and works well with your iOS devices. Plus you get an integrated touchpad.

Thursday, October 29, 2009

Razer Orochi Bluetooth Gaming Mouse


Mac software seems to be missing some functionality that the pc version has like button customization/profiles. Hopefully they will add it soon.


http://www.razerzone.com/gaming-mice/razer-orochi/

- Picked it from amazon for a sickening price of $80!!! It is NOT cheap.
- It's the first bluetooth mouse I found built specifically for gaming.
- Works perfectly fine with the built in bluetooth on my macbook pro and Dell Inspiron 8600. No drivers required.
- Most importantly it's got all the buttons I require and then some in the right place. The two buttons on the right side are used for on the fly sensitivity adjustment by default. What I really like are the forward/back buttons are placed just right.
- The mouse is still smaller than a standard mouse. When will companies figure out that I'd rather have a nice normal size mouse than saving an inch of storage space.
Still, it's one of the more comfortable and usable notebook mice.
- It uses standard 2XAA batteries so you can use your own rechargeable batteries if you want.
- It is convertible! Attach the included usb cable (nicely braided, 3ft) and you've got a wired mouse with increased precision! Bluetooth precision was fine but wired is even better for those situations where you might need it. It's also needed to change some of the features on the mouse like the mouse wheel light (when enabled it only comes on when you move the mouse) and storing settings in the on board memory. There are drivers for both mac and pc for use while in wired mode. The usb cable mode cannot be used to recharge batteries.
- There is a power button on the underside.
- Scroll wheel is a nice ratchet one good for gaming.
- Comes with a nice carrying case.
- Packaging reminds me of apple.
- There is a new version of the firmware (1.03) that I need to try out. The firmware installer is for windows only.

Recommended though maybe not at the current price. I feel it's the best bluetooth mouse I've used (with the best button placement) yet but at $80 it's a little hard to recommend when you can get Microsoft presenter 8000 for half the price. Is it worth it? Only if you want the best bluetooth mouse (no dongle!!!) for gaming currently available at any price.